
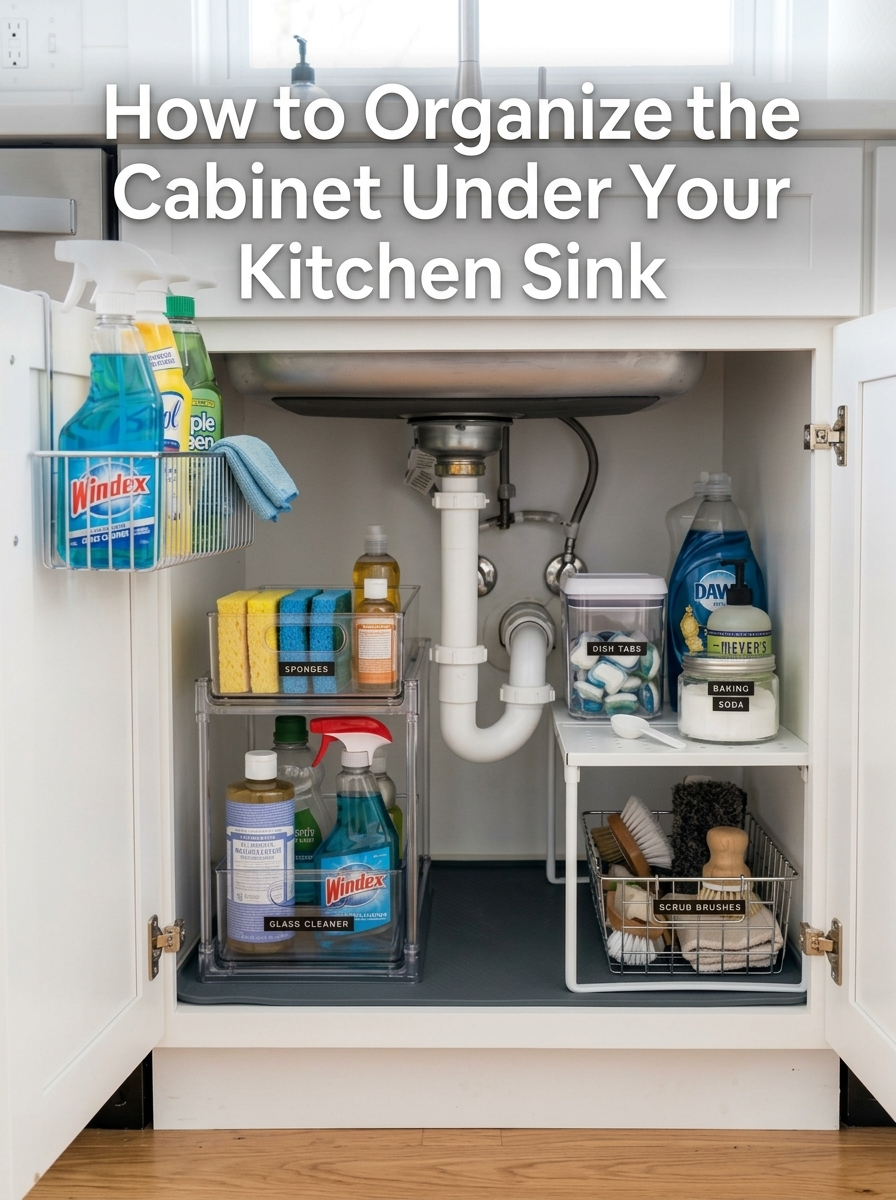
The cabinet under your kitchen sink is notoriously tricky to manage. Between curved drainage pipes, garbage disposal units, water shut-off valves, and pull-out sprayer hoses, the actual usable space is awkward, dark, and fragmented.
Because it stays hidden behind closed doors, it quickly turns into a dumping ground for half-empty bottles of cleaner, damp sponges, extra trash bags, and random scrub brushes. When you need something quickly, you find yourself knocking over bottles and digging into dark corners.
Transforming this awkward spot does not require custom carpentry or expensive renovations. With a methodical approach and the right storage strategy, you can turn this chaotic cabinet into one of the most functional, easy-to-maintain zones in your kitchen.
Follow this complete step-by-step guide to conquer under sink kitchen cabinet organization once and for all.
Step 1: Empty and Deep Clean the Entire Cabinet
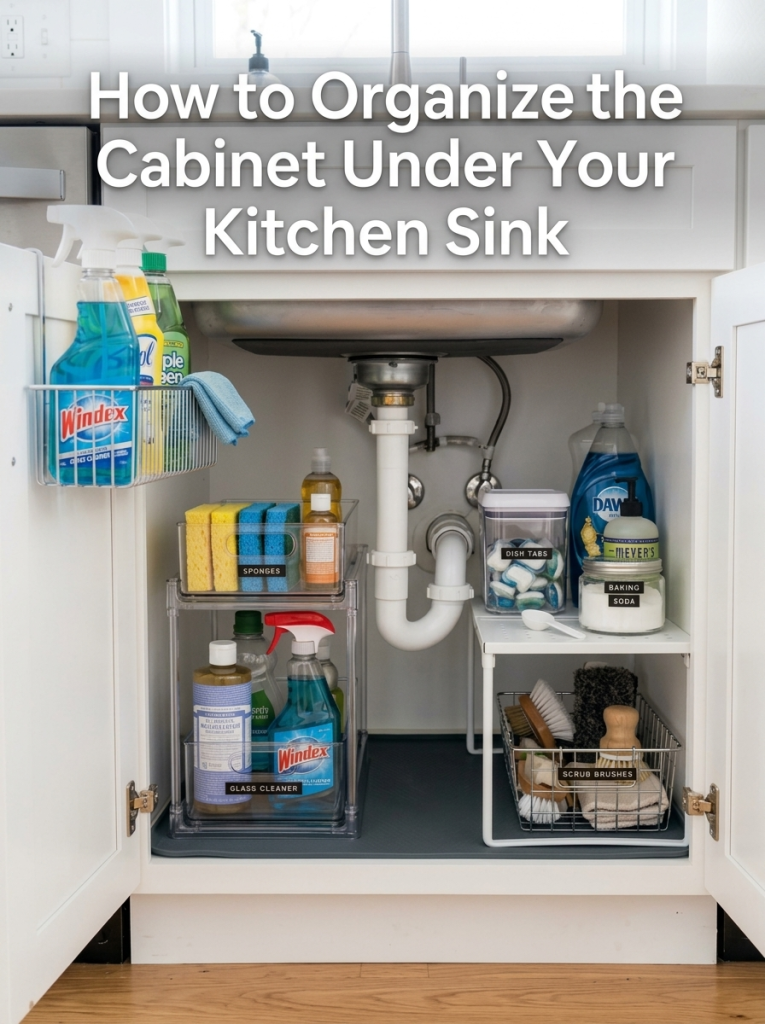
Starting with a clean slate is essential. You cannot organize around existing clutter, and you need to inspect the condition of the cabinet base before adding storage containers.
Remove Everything
Take every single item out of the cabinet and place it on your kitchen counter or floor. Do not leave a single bottle, rag, or stray dishwasher tab behind.
Sort and Declutter
Group your items into three distinct piles:
- Keep: Everyday cleaning supplies, active dish soaps, sponges, and dishwasher detergent.
- Relocate: Items that do not belong under a kitchen sink, such as bulk pantry goods, dangerous chemical combinations, or overflow products that should live in a utility closet or garage.
- Discard: Empty containers, expired formulas, degraded sponges, rusted wire pads, and mystery bottles you have not touched in a year.
Dispose of household chemicals responsibly according to your local municipal guidelines rather than pouring hazardous liquids down the drain.
Clean and Inspect
Vacuum up loose crumbs, dust, and dried detergent spills. Wipe down the interior walls, base, and plumbing fixtures with warm water and a mild dish soap or all-purpose cleaner.
Take this opportunity to run your faucet and inspect the P-trap, disposal, and hose connections with a flashlight. Catching a slow drip now prevents costly wood rot and mold damage under your organizers later.
Step 2: Protect the Cabinet Floor
Before installing storage solutions, protect the bottom surface. Leaks, drips from wet sponges, and chemical rings from cleaning bottles can quickly warp cabinet floors and degrade laminate.
Install a Waterproof Under-Sink Mat
The most durable solution is a heavy-duty silicone under-sink tray designed with raised edges. These mats can hold up to several gallons of water in the event of an unnoticed leak, protecting your cabinetry and subfloor from water damage.
Alternatively, install a thick, non-adhesive, wipeable shelf liner. Avoid paper or fabric liners, which absorb moisture, trap odors, and harbor mildew.
Step 3: Measure the Real Usable Space
Careful measuring prevents the frustration of buying organizers that collide with plumbing pipes or prevent your cabinet doors from latching.
Grab a tape measure and record:
- Total internal dimensions: Width, overall depth, and interior height.
- Obstruction depths: The distance from the back wall to the front face of the plumbing pipes and garbage disposal.
- Vertical clearances: The distance from the cabinet floor to the lowest hanging pipe or disposal motor on both the left and right sides.
- Door clearance: Account for interior hinges, structural frame lips, and the swing path of the doors. If you plan to hang caddies on the inside of the doors, subtract at least 4 to 5 inches from your total usable interior depth.
Step 4: Choose the Best Under-Sink Storage Solutions
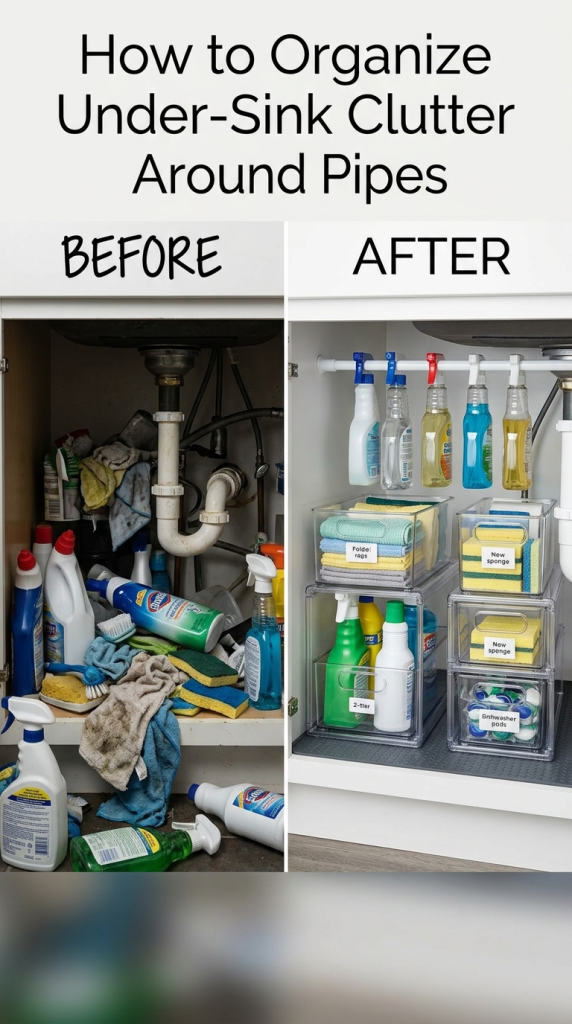
Plumbing divides your under-sink area into distinct vertical and horizontal zones. Choosing modular, specialized organizers makes the most of these awkward nooks.
Two-Tier Sliding Drawers
Pull-out cabinet organizers are the gold standard for deep under-sink cabinets. Sliding metal or clear acrylic wire drawers allow you to reach items stored in the back without kneeling on the floor or knocking over front-row items. Look for models where the top basket is narrower than the bottom basket, allowing the unit to slide past plumbing lines cleanly.
Expandable Pipe-Surrounding Shelves
If you have complex plumbing, an expandable under-sink shelving unit works wonders. These systems feature metal frame rails with snap-in, removable plastic shelf tiles that you can arrange around vertical drainage pipes and disposal units.
Clear Acrylic Bins with Handles
Clear, straight-walled storage bins group similar items together while keeping them fully visible. Acrylic bins keep liquid leaks contained if a bottle cap loosens, and built-in handles allow you to slide out an entire category at once.
Lazy Susans (Turntables)
A single-tier turntable placed in an open back corner makes awkward blind spots fully accessible. A gentle spin brings specialty stain removers or drain treatments straight to your fingertips. Look for turntables with a 2-to-3-inch raised rim to prevent tall spray bottles from tipping over.
Tension Rods
Installing a sturdy, adjustable tension shower rod across the upper section of your cabinet creates an elevated hanging rack for spray bottle triggers. This instantly frees up prime real estate on the cabinet floor for bins and baskets.
Step 5: Categorize and Group Your Supplies
Grouping your supplies by task prevents you from rummaging through bottles when working on routine chores. Place like items with like items using the following system:
- Daily Dishwashing Station: Dish soap refills, rinse aids, spare dish sponges, scrubbing brushes, and dishwasher detergent pods.
- Surface Cleaning Caddy: Multi-surface spray, granite or wood cleaner, microfiber cloths, and glass cleaner.
- Heavy-Duty & Deep Cleaning: Baking soda, white cleaning vinegar, descaling powders, drain cleaner, and scouring paste.
- Trash & Maintenance: Trash bag rolls, compost pail liners, disposal freshener tablets, and rubber cleaning gloves.
Step 6: Zone Your Cabinet for Daily Efficiency
An organized space only works if it matches your household routine. Place your supplies based on frequency of use and physical access.
The Everyday Prime Zone (Front Center & Dominant Side)
Keep your high-frequency essentials directly in front of the door you open most often. Dishwashing detergent, daily hand soap backups, and fresh sponges belong here at arm’s reach.
The Utility Side (Around the Disposal)
The side of the cabinet housing the garbage disposal usually has limited vertical clearance. Use this lower-height zone for low-profile pull-out drawers housing replacement sponges, microfiber cloths, or boxes of dishwasher tabs.
The Back Corners
Reserve back corners for items you only reach for occasionally, such as wood polish, metal cleaners, plumbing snakes, or drain declogging treatments.
Step 7: Utilize the Cabinet Doors and Vertical Height
In small kitchen organization, vertical space is your greatest asset. The empty air above your bottles and the flat surface of your cabinet doors offer high-value storage real estate.
Over-the-Cabinet or Adhesive Door Organizers
Mount slim wire baskets or clear adhesive caddies on the inside of the cabinet doors. This is the perfect spot for:
- Wet dish wands and scrub sponges (use a caddy with drainage holes)
- Rubber cleaning gloves
- Rolls of standard kitchen trash bags
Tip: Before sticking adhesive caddies to the door, dry-fit them and close the cabinet door to make sure the caddy does not hit the interior shelves or plumbing.
Adhesive Hooks
Stick small utility hooks on the inside walls or door interiors to hang:
- Microfiber dusting cloths
- Bottle cleaning brushes
- Rubber gloves hung by their cuffs with a binder clip
Step 8: Label Everything for Long-Term Maintenance
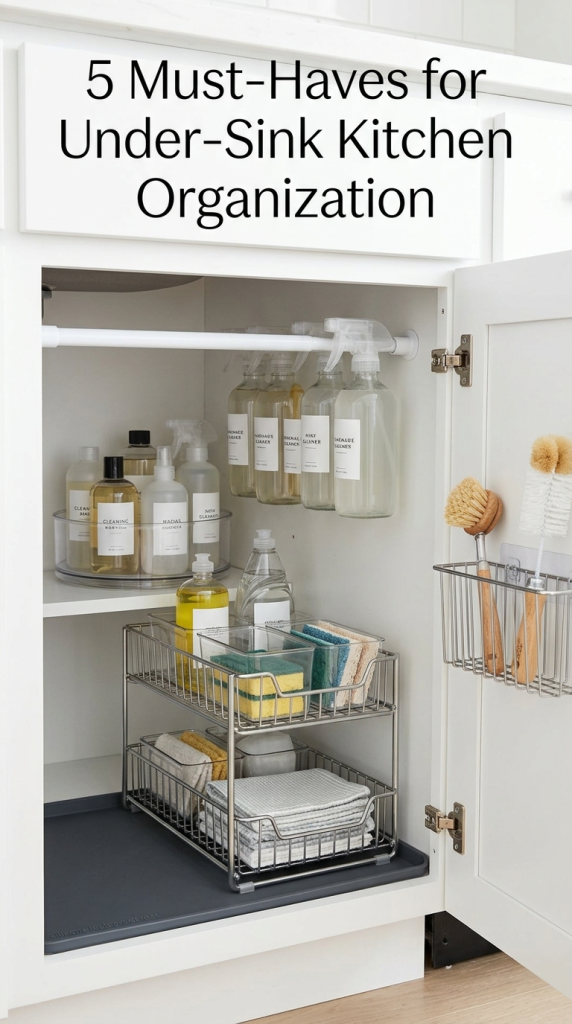
Labeling your containers keeps family members and houseguests from putting items in the wrong place.
Use a water-resistant label maker, pre-printed vinyl pantry/cleaning labels, or an acrylic paint marker directly on smooth bin surfaces. Clearly label bins with straightforward categories: DISH CARE, SPONGES & RAGS, SURFACE SPRAYS, and TRASH SUPPLIES. When every item has an unmistakable home, clutter does not return.
Safety Rules: What NOT to Store Under Your Kitchen Sink
Because the area under the kitchen sink is prone to humidity, plumbing leaks, and curious toddlers or pets, certain items should never be kept here:
- Harsh Chemical Mixtures (Bleach and Ammonia): Storing concentrated bleach alongside ammonia-based glass cleaners creates a risk of accidental mixing, which generates hazardous, toxic chloramine fumes.
- Absorbent Paper Goods: Extra bulk rolls of paper towels, napkins, and tissue boxes absorb ambient moisture, attract pests, and get ruined instantly if a leak occurs.
- Pantry Food or Pet Food: High humidity promotes mold growth, and leaking plumbing can quickly contaminate edible goods.
- Small Electrical Appliances: Hand mixers, immersion blenders, and toasters should never be stored directly below plumbing joints or water supply lines.
If you have young children or pets, install magnetic child-safety cabinet locks on both doors, even if you keep your heavy cleaning supplies elsewhere.
Under-Sink Maintenance Routine
To prevent your cabinet from slipping back into chaos, adopt a simple maintenance cadence:
- Weekly: Wipe out the sponge tray, discard worn dish scrubbers, and restock daily dish tablets.
- Monthly: Check the base mat for drips or moisture, wipe down the tops of spray bottles, and wipe out any collected dust inside bins.
- Seasonally: Take inventory of your cleaners, consolidate half-empty duplicates, and wipe down the interior cabinet walls.
Frequently Asked Questions
How do I organize under my kitchen sink around large plumbing pipes?
Use modular components rather than one large fixed organizer. Place an expandable under-sink shelf with removable slats directly around the P-trap, or place two independent, narrow sliding drawers on either side of the pipes. Adding adhesive door racks also bypasses interior plumbing obstructions entirely.
What is the best way to store kitchen trash bags under the sink?
You can mount an adhesive trash bag dispenser to the inside of the cabinet door, place a wire dispenser rack on the cabinet floor, or slide rolls onto a wall-mounted paper towel holder attached to the interior side wall.
How do I prevent moisture and bad odors under the sink?
First, ensure you have no active water leaks. Next, avoid storing damp sponges or soaking-wet cleaning rags in closed bins; allow them to dry on an elevated rack or hook. Place a small, open container of baking soda or a moisture-absorbing activated charcoal bag in the back corner to capture ambient humidity and neutralize stale odors.
Tackling your under-sink cabinet eliminates daily friction in your kitchen routine. By clearing the clutter, protecting the base, and using smart vertical storage around your pipes, you transform a dark, chaotic catchall into an organized, functional workstation. Pick a weekend morning, pull everything out, and follow these steps to build a system that stays tidy for the long haul.